Photomontage for Planning: Matching Model, Photo, Camera and Light.
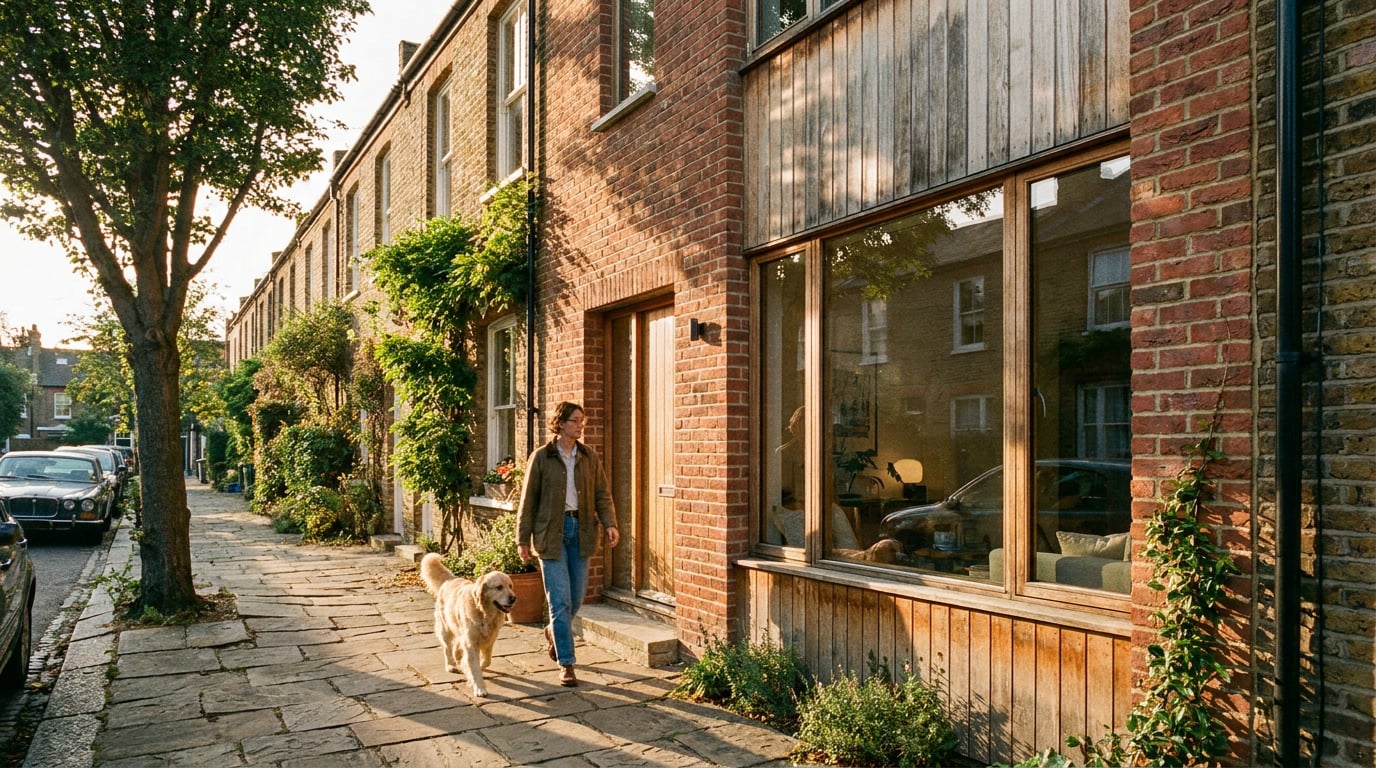
A planning photomontage fails on the match, not the model. How to lock camera, horizon, scale and light so the proposal sits in the site photo and survives scrutiny.
Why Planning Photomontages Get Challenged
 A planning photomontage is evidence, not a picture. The case officer, the neighbour at number 14 and the committee member who drove past the site that morning will all compare your image with what they see when they stand on the street. Any mismatch reads as misrepresentation, and once one view loses credibility, the rest of the application loses some with it.
The failures repeat. A wrong lens makes the proposal look further away or taller than it will be. A horizon that does not agree with the photo tilts the whole scene. A building sits too tall or too small against its neighbours, or the light contradicts the shadows already on the ground. None of these needs bad intent to land badly.
One distinction matters before anything else. **Verified views** are a separate discipline from a persuasive render: survey-located camera positions, documented focal lengths and a method statement. Where a local authority or heritage body asks for that level of rigour, the method is the deliverable. This article covers the matching craft that sits underneath it, not formal verification.
The test is simple. Put the montage next to the plain photograph and ask whether a stranger could tell which one was edited from the surroundings alone. If they can, something has drifted.
Everything outside the footprint of the proposal should be identical in the photo and the montage. The edit belongs to the building, not the street.
Capture the Site Photo as Data, Not Just an Image
 Most montage problems are born on site. A photograph taken casually, at a convenient height, with a phone's automatic wide-angle correction, cannot be matched afterwards without guesswork. Treat the camera as a measuring instrument.
Record where you stood
Pin the standing point on the survey. Note the eye height of the camera, and photograph at a consistent height across all your views so the horizon is predictable from one viewpoint to the next. A tripod at a fixed height is the simplest discipline: if every view sits at 1.6m, the horizon in every view tells the same story.Keep the lens honest
Shoot at a known focal length. Avoid in-camera wide-angle distortion and automatic lens correction, which quietly changes the geometry you are trying to reproduce. Never crop in a way that changes the field of view without noting it. A cropped image has a different effective lens, and the model camera has to follow.Log the conditions
Date, time, weather and sun direction decide how you light the model later. Write them down at capture, not from memory in the office. A two-line note per viewpoint is enough.Photograph things that survive in the model
Fixed reference points do the heavy lifting in matching: kerb lines, door heads, chimney stacks, lamp posts and boundary walls whose heights are known or surveyable. If you can see a chimney stack in the photo and measure it against the survey, you have a scale check that no amount of software cleverness can replace.Shoot a clean set per viewpoint
Take a wide establishing view for context and a tighter one on the proposal, so the montage still reads at planning-document scale. A single sweeping shot often shrinks the proposal to a sliver once it is placed on a Design and Access Statement page.| Capture item | What to record | Why it matters later |
|---|---|---|
| Standing point | Position on survey, eye height | Fixes camera position and horizon |
| Lens | Focal length, no auto-correction, crop notes | Fixes field of view and perspective |
| Conditions | Date, time, weather, sun direction | Drives lighting and shadow match |
| Reference points | Kerbs, door heads, stacks, boundary walls | Verifies scale in the model overlay |
| Image set | Wide and tight per viewpoint | Keeps the proposal legible on the page |
Matching the Camera: Horizon, Lens and Scale in Your Model
 With a clean capture in hand, the model camera has to be made to agree with the real one. Set it to the same height and approximate field of view as the photograph, then align the **horizon line first**. Every vertical and perspective cue hangs off it. If the horizon is wrong, adjusting anything else is chasing a moving target.
Let the neighbours be the judge
Use your reference points to verify scale. Overlay the existing neighbouring building in the model on its photographed edges. If it does not sit on them, the camera is wrong, not the photo. This is the single most useful discipline in the whole process: the photograph is the truth, the model adapts.Build from a real model, on a real location
The view needs a model with real heights behind it. In Linea, that can be a massing placed on the actual location with the ground and surrounding buildings, or an imported massing from another package; Linea reads DWG, DXF and IFC, as well as GLB, FBX, OBJ, DAE and STL models. Check heights against the context before you render anything. A massing that has the right footprint and the wrong ridge height will produce a convincing and incorrect image. For early blocking-out, Linea's Massing workspace lets you place footprints, push them into solids and pitch a roof quickly, then switch to Build for the detailed walls and openings. New geometry arrives in a flat painted colour, so the first render of a massing is deliberately plain; that is a feature when you are checking height and bulk against a street.Keep verticals vertical
Correct converging verticals consistently across the whole set, and match how the photograph itself reads. A tilted-camera photograph with leaning verticals needs a model camera that leans the same way; a shift-corrected photograph needs a shift-corrected camera. Mixing the two across a set is how a series of montages starts to look like it came from different sites.Check the roofline against known neighbours
The eye reads relative height before it reads detail. Compare eaves and ridge against the neighbours on both sides. A proposal that is 600mm taller than it should be at the ridge will not look wrong in isolation, but it will look wrong the moment someone holds the photograph beside it.If the existing neighbour does not overlay its photographed edges, fix the camera. Never nudge the photograph to suit the model.
Matching Light, Weather and Shadow to the Photograph
A model that is geometrically perfect still reads as pasted in if the light is wrong. The photograph already holds a complete lighting record. Your job is to read it, not to improve it.Direction and softness
Match sun angle and shadow direction to the capture conditions. Shadows cast by the proposal must agree in direction and softness with the shadows already in the photo. Look at the chimney stacks, the lamp posts, the parked cars: they tell you exactly where the sun was and how hard the light fell.Weather honestly
A bright, sunlit scheme dropped into an overcast photograph looks pasted in immediately. An untouched overcast photograph flatters no one, but it is usually the more credible record. If the conditions are poor, shoot again on a better day rather than relighting the world to suit the scheme.Sample, then grade
Colour temperature and contrast need to agree. Sample the sky, a pale wall and a shadow in the photograph, and grade the render towards those values rather than towards what looks best. Three samples are usually enough to find the white point, the highlight ceiling and the shadow floor.Ground the building
Add contact shadows and reflected light where the building meets the ground, the boundary and the neighbours, so it sits in the scene instead of floating over it. A faint warm bounce off a sunlit brick wall onto a pale render is the sort of detail nobody notices when it is present and everybody senses when it is missing.Stay realistic about finish
A planning montage that is more saturated or crisper than the photograph is the first thing a reader doubts. The render should be no sharper than the photo it sits in, and no more colourful than the street around it.Compositing the Render Into the Photo in Retouch
With the camera and light matched, the render has to be placed into the photograph. In Retouch, bring the site photo and the model view in as layers. Retouch works non-destructively, so the original photograph stays intact underneath everything.Fit and occlusion
Use layer masks and the layers' transform tools, including flip, skew and per-corner perspective distortion, to fine-tune the fit without baking anything in. Dragging any of a layer's four corners independently is useful for the last few pixels of perspective correction. Foreground occlusion is where montages are won or lost. Trees, railings, parked cars, lamp posts and passers-by that sit in front of the proposal must overlap it. Use selections and masks to bring them forward; **Select by description** can find all the matching regions, such as every railing or all the foliage, in one go. Treat any automatic selection as a draft. Check the edges by eye at 100%: generative or automatic masking can erase or invent edges at exactly the places a planning reader tests credibility, such as branch tips against the sky or the gap between railings.Grade without destroying
Match the grade with an adjustment layer built from the Adjust panel (Light, Colour, point curves, HSL bands, dehaze). It stays non-destructive and maskable, so you can pull the building towards the photograph's tone without touching the street. Layer styles such as inner shadow or drop shadow are available and stay live and editable; use them sparingly for contact shadows, since a heavy drop shadow is a giveaway.Repair, do not reinvent
**Enhance area** re-renders a selected region at higher resolution with no prompt and composites it back through the selection, which helps when part of a wide render has gone soft or repetitive. **Material swap** corrects a facade's texture against an attached reference, as a toggleable layer, without re-rendering the whole view. Both are working tools for the render layer. Neither should be pointed at the photograph.Re-light presets are exploration
Retouch's re-light presets (Golden hour, Dusk, Overcast, Sunny and others) regenerate the whole document at a different time of day or weather. They are useful for exploring how a scheme might feel under different skies, for a client conversation or a design option. They are not a substitute for matching the actual capture conditions, and a re-lit document is no longer a record of the existing site. Keep it out of the evidential set.Keep two files for every view: the untouched photograph and the working montage. The photograph is the evidence; everything else is a layer on top of it.
The Final Check Before It Goes in the Application
Before the view leaves your hands, run the checks that a sceptical reader would run.- Flip between the original and the montage at the same size. Nothing outside the proposal should change, except where the building physically replaces what was there. If a tree has shifted or a cloud has changed, find out why.
- Review at the size the case officer will see it. That is a Design and Access Statement page or an A3 sheet, not a full-screen monitor. Check that the image still reads and the proposal is not lost in the frame.
- Label every view. State the location, viewing direction, date and time of capture and the lens used, so the montage is checkable by anyone who wants to stand where you stood.
- Place it with the original beside it. Lay out the sheet in Layout, as a Design and Access Statement document or a presentation sheet, with the original photograph alongside the montage. Export a vector PDF at true sheet size, so the page prints at the scale you designed it for.
- Leave compliance to the person carrying the liability. The montage shows the proposal. Whether it is acceptable in planning terms is a decision for the professional who carries the responsibility, and no tool, Corb included, makes that call.
Match the camera to the photograph, match the light to the shadows already there, mask what stands in front, label what you did, and keep the untouched original beside the result.A good planning montage is the one nobody argues with: the street looks like the street, and the only thing that has changed is the building.
Keep reading.
Try ArchAdemia Tools for yourself
Draw it, model it, render it, publish it. One place, built for architects and small practices. From £19 a month, all in.