Architecture Student Studio Workflow: Design Review to Final Jury.
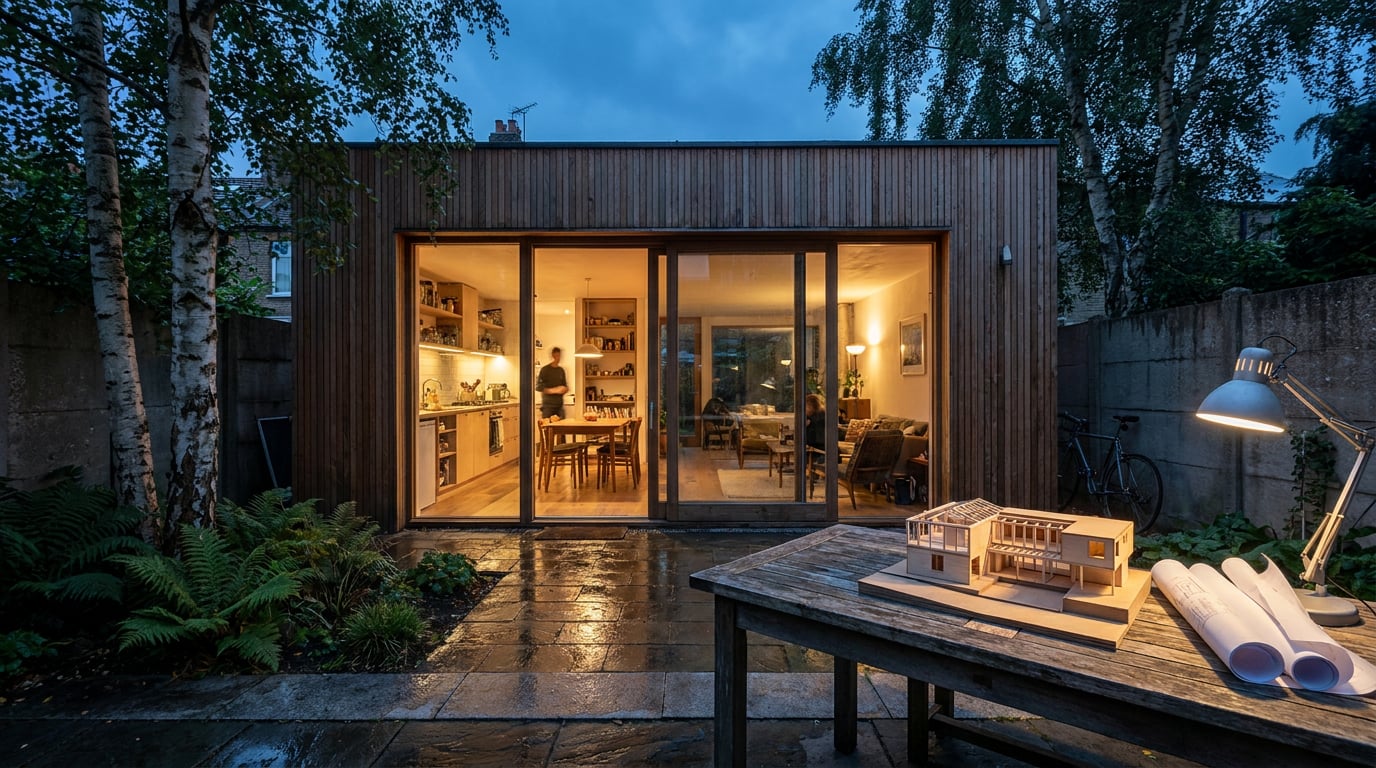
One term, one scheme, one platform. How an architecture student moves from the first pin-up to the final jury board without five subscriptions or a lost weekend.
Where a Studio Term Actually Loses Its Time
 The hours in a studio term rarely vanish into design. They vanish at handoffs: the drawing package to the modelling tool, the model to the render, the render to the layout, the layout to a PDF that actually fits the jury room's print slot. Design is the part you want to spend time on. File conversion is the part that spends your time for you.
The usual chain for a Part I student runs something like this: a drawing package for plans, a modelling package for massing, a render engine for stills, an image editor for fixing them, and layout software for the board. That is five licences, five file formats and five places where a late change has to be repeated. The tutor who asks you to pull the building back two metres at the Week 6 crit has not asked for much, but you may owe five applications a revision.
This is an observed pattern in how studio work is organised, not a measured statistic, and your course may split the chain differently. Plenty of students already combine two or three of these steps. The point stands either way: every boundary between applications is a place where a change gets lost or redone.
The alternative worth testing is one platform where Linea (drawing and modelling), Image, Retouch and Layout sit in the same dock, so a revised wall does not mean rebuilding the board from scratch. To be clear about the claim: that is how ArchAdemia Tools is built, and this article describes the product's workflow rather than a controlled study of student productivity. Judge it on your own project.
What follows is one imagined Part I scheme, a small community boathouse on a tidal edge, tracked from the first design review to the final jury. Each stretch of weeks maps to specific surfaces, so you can see which tool does which job and where the limits are.
The entry point costs nothing to test. The free plan is a 7-day trial with 30 credits a day and no card. The daily credits do not roll over, and images made on the free plan carry a small ArchAdemia Tools watermark. That is enough to push a live project through the workflow and find out whether it suits you before you commit to anything.
The hours in a studio term rarely vanish into design. They vanish at handoffs: the drawing package to the modelling tool, the model to the render, the render to the layout, the layout to a PDF that actually fits the jury room's print slot. Design is the part you want to spend time on. File conversion is the part that spends your time for you.
The usual chain for a Part I student runs something like this: a drawing package for plans, a modelling package for massing, a render engine for stills, an image editor for fixing them, and layout software for the board. That is five licences, five file formats and five places where a late change has to be repeated. The tutor who asks you to pull the building back two metres at the Week 6 crit has not asked for much, but you may owe five applications a revision.
This is an observed pattern in how studio work is organised, not a measured statistic, and your course may split the chain differently. Plenty of students already combine two or three of these steps. The point stands either way: every boundary between applications is a place where a change gets lost or redone.
The alternative worth testing is one platform where Linea (drawing and modelling), Image, Retouch and Layout sit in the same dock, so a revised wall does not mean rebuilding the board from scratch. To be clear about the claim: that is how ArchAdemia Tools is built, and this article describes the product's workflow rather than a controlled study of student productivity. Judge it on your own project.
What follows is one imagined Part I scheme, a small community boathouse on a tidal edge, tracked from the first design review to the final jury. Each stretch of weeks maps to specific surfaces, so you can see which tool does which job and where the limits are.
The entry point costs nothing to test. The free plan is a 7-day trial with 30 credits a day and no card. The daily credits do not roll over, and images made on the free plan carry a small ArchAdemia Tools watermark. That is enough to push a live project through the workflow and find out whether it suits you before you commit to anything.
Time is lost at the seams between applications, not inside them. Count your file handoffs before you count your hours.
Weeks 1 to 3: Site, Massing and the Plan You Can Defend at Review
 Start in Linea with the site. Most courses hand out a DXF or DWG, and those files are rarely tidy: a practice or university CAD file routinely holds twenty-odd drawings in one model space, all on the same layers. Linea's import dialog draws the file before it lands and outlines the separate drawings it finds. Click the region you need, or drag a box by hand, and the import crops to that single plan, cut clean at the edge and landing on the origin. You do not have to delete nineteen drawings you never wanted.
From there, block out the scheme in the Massing workspace. Place footprints, which land flat as unextruded faces, then push one into a real solid. Drag an edge upward to pitch a roof. Draw a rectangle on an existing face to set out a window opening, and Extrude punches it clean through. Group blocks to hide scaffolding without deleting it. For the boathouse, that might be three volumes: a boat hall, a clubroom and a slender bridge element over the slipway. Once the massing reads, switch to Build for parametric walls, doors, windows and stairs.
A note on finish: new geometry in Linea is born in a flat painted colour. A new wall is white, floors and roofs are light grey. A photographic material only appears on a surface because you painted it there, so do not expect the brick to arrive on its own.
The point that matters for review week is that the 2D plan and the 3D model are one drawing, edited together, rather than one generated from the other. The section you cut for the Week 3 review is the same building as the plan on the wall beside it. You are not keeping two drawings in sync by hand, which is where most mid-term errors are born: a plan that says one thing and a section that says another.
Exact sizes are typed rather than dragged. Mid-gesture, start typing a number and it lands in a box beside the cursor. Enter applies it. Lengths read in the drawing's own units, so 6ft and 1200mm both parse. For a student working to a set brief, with a boat hall that must clear a given door width, typed values beat eyeballing it on screen.
### Asking Corb questions about the drawing
Corb sits as an assistant chip beside the 2D/3D toggle in the Linea editor. Asking it questions about your drawing is free. It can also build or change the model on request, but that works differently: Corb proposes the job in a card that states the real credit cost, and nothing is drawn until you confirm.
Be precise about the fence here, because it is the useful part. Ask Corb about the boat hall's north-facing glazing and it can name a daylight issue, explain why it matters and say who decides it. It will not tell you the scheme complies, or that it does not. That call belongs to whoever carries the professional liability, and for a student that is your tutor and, eventually, the regulations themselves. Corb also will not invent a dimension. If the project notes lack a ridge height, it names the number it would need and asks for it. Treat it as a well-read second pair of eyes before the crit, not a verdict.
### The honest limit
Linea is a drawing and modelling tool for studio and everyday practice work. It is not a BIM tool. If your course is Revit-heavy and requires Revit-native deliverables, you will still need Revit for those. Linea imports native IFC files from Revit or ArchiCAD, parsed in the browser with nothing uploaded, and exports DXF, so moving work in and out of real CAD is possible. But it will not replace a BIM environment where the course demands one.
Start in Linea with the site. Most courses hand out a DXF or DWG, and those files are rarely tidy: a practice or university CAD file routinely holds twenty-odd drawings in one model space, all on the same layers. Linea's import dialog draws the file before it lands and outlines the separate drawings it finds. Click the region you need, or drag a box by hand, and the import crops to that single plan, cut clean at the edge and landing on the origin. You do not have to delete nineteen drawings you never wanted.
From there, block out the scheme in the Massing workspace. Place footprints, which land flat as unextruded faces, then push one into a real solid. Drag an edge upward to pitch a roof. Draw a rectangle on an existing face to set out a window opening, and Extrude punches it clean through. Group blocks to hide scaffolding without deleting it. For the boathouse, that might be three volumes: a boat hall, a clubroom and a slender bridge element over the slipway. Once the massing reads, switch to Build for parametric walls, doors, windows and stairs.
A note on finish: new geometry in Linea is born in a flat painted colour. A new wall is white, floors and roofs are light grey. A photographic material only appears on a surface because you painted it there, so do not expect the brick to arrive on its own.
The point that matters for review week is that the 2D plan and the 3D model are one drawing, edited together, rather than one generated from the other. The section you cut for the Week 3 review is the same building as the plan on the wall beside it. You are not keeping two drawings in sync by hand, which is where most mid-term errors are born: a plan that says one thing and a section that says another.
Exact sizes are typed rather than dragged. Mid-gesture, start typing a number and it lands in a box beside the cursor. Enter applies it. Lengths read in the drawing's own units, so 6ft and 1200mm both parse. For a student working to a set brief, with a boat hall that must clear a given door width, typed values beat eyeballing it on screen.
### Asking Corb questions about the drawing
Corb sits as an assistant chip beside the 2D/3D toggle in the Linea editor. Asking it questions about your drawing is free. It can also build or change the model on request, but that works differently: Corb proposes the job in a card that states the real credit cost, and nothing is drawn until you confirm.
Be precise about the fence here, because it is the useful part. Ask Corb about the boat hall's north-facing glazing and it can name a daylight issue, explain why it matters and say who decides it. It will not tell you the scheme complies, or that it does not. That call belongs to whoever carries the professional liability, and for a student that is your tutor and, eventually, the regulations themselves. Corb also will not invent a dimension. If the project notes lack a ridge height, it names the number it would need and asks for it. Treat it as a well-read second pair of eyes before the crit, not a verdict.
### The honest limit
Linea is a drawing and modelling tool for studio and everyday practice work. It is not a BIM tool. If your course is Revit-heavy and requires Revit-native deliverables, you will still need Revit for those. Linea imports native IFC files from Revit or ArchiCAD, parsed in the browser with nothing uploaded, and exports DXF, so moving work in and out of real CAD is possible. But it will not replace a BIM environment where the course demands one.
One drawing, two views. The section you cut for review is the same building as the plan, not a second drawing waiting to drift out of sync.
Weeks 4 to 7: Sections, Elevations and the Mid-Term Crit Sheet
 Mid-term is where the drawing set has to become a sheet. In Linea, cut sections and elevations from the model as real linework and issue them on a sheet at a true plotted scale, on a chosen paper size, with a title block. Export that sheet as a PDF and the scale is the scale you set, not whatever the print dialogue decided.
The part that saves a week is saved views. When the tutor asks you to push the building back two metres, you move the model and reissue the same elevation from the saved view, rather than redrawing the sheet. The sheet is downstream of the model, so the model changing is a re-issue, not a rebuild.
Not all studio work starts on screen. Photograph a site sketch on your phone and add it as a trace guide in Linea. It arrives uncalibrated, so set a real-world length on desktop afterwards and the sketch becomes a scaled underlay. Be clear about the boundary: on a phone, Linea opens a stripped-back version with the models list and a drawing's sketches. The drawing itself stays desktop work.
### Diagrams in Vector
The diagrams that sit around your drawings are where mid-term sheets are often won or lost: the figure-ground, the circulation diagram, the sun path. Vector is the studio for these. Its front door is Import. Drop in a vector-ready PDF or a DXF and it lands as real, editable linework. Like Linea's dialogue, it finds the separate drawings inside a crowded file, so you click to crop to the one plan you want and set its real-world scale.
From there you build the diagram as real paths. For the boathouse, a figure-ground is the site footprint filled solid against the surrounding buildings. Select a closed shape, fill it, and use the Paint Bucket to flood any area enclosed by the lines around it, with a gap tolerance so walls that stop short of each other still enclose an area. Multiply blend mode on a region fill lets the linework underneath read through the colour, which is exactly what you want on a plan. Export as PDF, SVG, DXF or PNG when it is done.
Vector, like most of the suite, is a desktop tool for real drawing. On a phone it opens a companion for reviewing documents and photographing a sketch onto one.
### Group work versus solo work
The group project and the solo project fail in different places. On a solo project, the risk is you: one person, one model, one source of truth. On a three-person group project, the risk is ownership. Who holds the shared model, and who has the current version of the site plan?
Projects is the answer here: a workspace where everyone's files for a scheme live together, rather than three versions of the boathouse model travelling by email under names like final_v3_REAL. Agree early who edits the site model and who works in copies, and keep that decision written down in the project.
Mid-term is where the drawing set has to become a sheet. In Linea, cut sections and elevations from the model as real linework and issue them on a sheet at a true plotted scale, on a chosen paper size, with a title block. Export that sheet as a PDF and the scale is the scale you set, not whatever the print dialogue decided.
The part that saves a week is saved views. When the tutor asks you to push the building back two metres, you move the model and reissue the same elevation from the saved view, rather than redrawing the sheet. The sheet is downstream of the model, so the model changing is a re-issue, not a rebuild.
Not all studio work starts on screen. Photograph a site sketch on your phone and add it as a trace guide in Linea. It arrives uncalibrated, so set a real-world length on desktop afterwards and the sketch becomes a scaled underlay. Be clear about the boundary: on a phone, Linea opens a stripped-back version with the models list and a drawing's sketches. The drawing itself stays desktop work.
### Diagrams in Vector
The diagrams that sit around your drawings are where mid-term sheets are often won or lost: the figure-ground, the circulation diagram, the sun path. Vector is the studio for these. Its front door is Import. Drop in a vector-ready PDF or a DXF and it lands as real, editable linework. Like Linea's dialogue, it finds the separate drawings inside a crowded file, so you click to crop to the one plan you want and set its real-world scale.
From there you build the diagram as real paths. For the boathouse, a figure-ground is the site footprint filled solid against the surrounding buildings. Select a closed shape, fill it, and use the Paint Bucket to flood any area enclosed by the lines around it, with a gap tolerance so walls that stop short of each other still enclose an area. Multiply blend mode on a region fill lets the linework underneath read through the colour, which is exactly what you want on a plan. Export as PDF, SVG, DXF or PNG when it is done.
Vector, like most of the suite, is a desktop tool for real drawing. On a phone it opens a companion for reviewing documents and photographing a sketch onto one.
### Group work versus solo work
The group project and the solo project fail in different places. On a solo project, the risk is you: one person, one model, one source of truth. On a three-person group project, the risk is ownership. Who holds the shared model, and who has the current version of the site plan?
Projects is the answer here: a workspace where everyone's files for a scheme live together, rather than three versions of the boathouse model travelling by email under names like final_v3_REAL. Agree early who edits the site model and who works in copies, and keep that decision written down in the project.
Issue sheets from saved views. When the building moves, you reissue the elevation instead of redrawing it.
Weeks 8 to 10: Atmosphere, Renders and Fixing What Looks Wrong
By Week 8 the geometry should be settled and the question becomes how the building feels. Send a perspective view straight from Linea into Image to generate your hero exterior and interior stills. Alternatively, capture views for Shoot, which generates a full set of camera angles for a scheme and handles exterior and interior separately. A finished set of stills is a complete outcome on its own; nobody is obliged to make a film. Animating kept stills into a short film is optional, and for most jury boards it is unnecessary. ### What Corb can say about an untextured shot Before spending credits on a render, show Corb the raw massing shot on the canvas. It reads the image against the project notes it already holds and can comment on footprint, height against the neighbours, roof form, opening rhythm, the entrance and how the building meets the ground. It says nothing about material or finish, because an untextured model cannot show either. That is a useful constraint: you get design feedback on the thing that is actually on screen. ### Variation sets, honestly described Corb can also spawn a set of two to six variations off one image it has been shown, moving along a single axis: time of day, weather, camera, entourage or grade. A geometry-holding clause, written by the server, goes into every prompt in the set, instructing the model to keep the massing, storey heights, roof form and openings still. Be honest about what that is. It is a preservation instruction to the model, not a geometric lock, so check the results against your drawing. And these are readings of the scheme you drew: four ways the boathouse corner reads at dawn, noon, dusk and under heavy cloud. They are not alternative schemes. The variations land idle, so nothing costs credits until you run them. ### Fixing the render in Retouch A render rarely arrives finished. Retouch is where it gets fixed, non-destructively, with layers you can mask and revisit:- Enhance area: select a soft or repetitive region, such as a wide stretch of water or cladding, and it re-renders at higher resolution with no prompt, compositing back through your selection.
- Material swap: replace a selected area's texture to match an attached reference, as a toggleable layer. Try the larch against a charred-timber reference without touching the rest of the image.
- Re-light presets: move golden hour to overcast, or to dusk, in one click. Each regenerates the whole document as a new layer.
- Select by description: type "all the brickwork" and every matching region is selected, ready for a grade or a mask.
Regenerate for composition, retouch for detail. A masked edit is easier to defend at a crit than a fourth regeneration.
Final Jury Week: One Board, One PDF, One Link
Jury week is where the five-application chain usually hurts most, so it is where a single dock pays back. Build the board in Layout as a Sheet, which is one large surface at A1 landscape by default. Start from the Competition Board or the Image-led Board template. Templates arrive populated with placeholder text and image frames only, so the structure is there and the content is yours. Turn on the layout grid, either Manuscript, Columns or Modular. Plan, section, diagrams and renders snap to it, which is what gives a board a clear reading order from across the room. The grid is a reference overlay only and never appears in the export or a shared page. Pull guides off the rulers, and snap to page edges, guides and other elements. Set type from the self-hosted type library of 300 families, or upload your own studio font in TTF, OTF or WOFF. Drag your imagery straight in from the gallery: the Linea sheet export, the Vector diagrams, the retouched renders. If the tutor's final comment moves the building, you re-issue the section from the saved view, drop it onto the same frame and the board stays composed. ### The Design and Access Statement If your course asks for a supporting Design and Access Statement, build it in Layout as a Document, many pages at A3. Corb works inside Layout in two ways. Select a text frame and ask it to fill that one. Or ask it to build a whole new document from a prompt, working from a template page by page, on a model you pick from Sonnet, Opus or Fable. Check every sentence it writes against your own scheme, and supply the figures yourself: it will not invent a dimension, and it will not tell you the scheme complies with anything. Manual layout work costs no credits; asking Corb to write or build does. ### Export, print and share Export a vector multi-page PDF at true sheet dimensions, with optional bleed and crop marks for the print shop. Vector output means linework stays crisp at A1, which a flattened raster will not give you. You can also export a PNG or a ZIP of every page. For external examiners who are not in the room, share a read-only link. It is revocable, re-issuable and stays current as you edit, so a late change to the board reaches the link without a new upload. On the free plan, shared links carry a small footer, removed on paid plans. Layout is available on every plan including Free. On a phone it opens a stripped-back version for the documents list, page reordering, rewriting text, swapping a picture, the share link and a server-rendered PDF export. Placing elements, type styling, guides and grids stay on desktop. ### A weekly checklist| Studio milestone | Surface | Job |
|---|---|---|
| Weeks 1 to 3: site and review | Linea | Import and crop the site, block out massing, cut the review section |
| Weeks 4 to 7: mid-term crit | Linea, Vector, Projects | Issue sheets from saved views, build diagrams, share the model |
| Weeks 8 to 10: atmosphere | Image, Shoot, Retouch, Corb | Generate stills, read the massing, fix regions in layers |
| Jury week: final board | Layout | Compose the Sheet, write the Document, export PDF, share link |
Start the free trial in the week you actually need it, on a live project, so the 7 days and 30 daily credits are spent on your own scheme rather than on a demo.
Keep reading.
Try ArchAdemia Tools for yourself
Draw it, model it, render it, publish it. One place, built for architects and small practices. Plans from £29 a month, all in.