The Render view
The Render view turns what the camera sees into a picture. You frame the shot in the live model, choose a model and a look in the tray, and the result lands in the Results row and in your gallery.
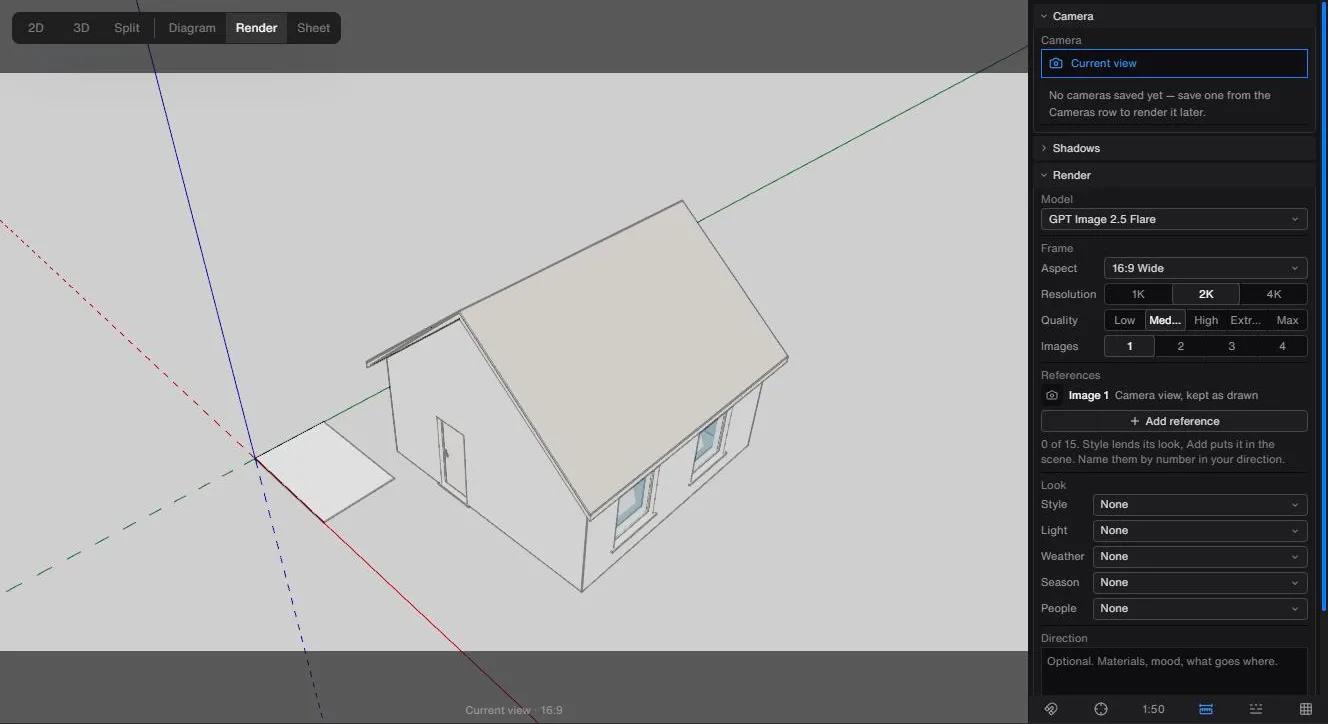
To make a render
- Click Render (the sparkle icon, labelled at wider widths) in the view pill at the top left. The 3D model stays live, so you can still orbit, pan and zoom to find the view.
- In the Camera row, choose Current view, or one of your saved perspective cameras. Choosing a camera flies the view to it.
- Set sun and shadows in the Shadows row if you want to change them.
- In the Render row, pick the Model, Aspect, Resolution, Quality and number of Images.
- Add anything optional: references, a Look, a Direction.
- Click the button at the foot of the Render row. It shows what the render will cost before you press it.
A frame guide on the canvas shows exactly the picture the model will receive, with the surround darkened and the camera name and aspect printed at the bottom. It redraws the moment you change Aspect. Orbiting, panning or zooming while a camera is picked drops the pick back to Current view, because the view no longer matches the camera.
If nothing is stored for shadows in the drawing, Render switches them on for you and puts the earlier setting back when you leave. Shadows you have set yourself, on the model or on a camera, are left alone.
The Camera row
Current view is selected by default and leaves the camera where it is. Below it is one button per saved perspective camera. With none saved, the row says to save one from the Cameras row. The quickest route in is the Render from this camera button on a camera in the Cameras row, which picks the camera and switches to Render in one go; see Saving camera views.
The Shadows row
This is the same row as in the model view: Shadows, Lightness, the Sun by Bearing or by Date and time, and Elevations and sections. A camera can keep its own shadows, and the row says whose shadows you are changing. See Sun and shadows.
The Render row
- Model is a dropdown, each option with a one-line note on what it is good at: Nano Banana 2, GPT Image 2.5 Flare, GPT Image 2.5 Sunburst, Seedream 5.0 Pro and Luma Uni-1 Edit.
- Frame holds Aspect, Resolution, Quality and Images. Each offers only what the chosen model supports, and a control with one possible value is greyed out with the reason. Changing the model moves Aspect to the nearest one the new model offers. With more than one image, each lands as its own row in your gallery.
- References: the camera view is always Image 1, kept as drawn. Add reference opens the picker, and each added picture is set to Style (lend its look) or Add (put it in the scene). The row counts how many are sent; anything over the model's limit shows Not sent with the reason, and is kept rather than deleted. Refer to pictures by number in your direction.
- Look has Style, Light, Weather, Season and People dropdowns, each starting at None.
- Direction is free text for materials, mood and what goes where, up to 2000 characters. Whatever you write, the instruction that keeps your building as drawn is always sent first.
The button is greyed out with the reason when no drawing is open or an export is already running. If you don't have enough credits, the message under the button says what you need and what you have. A request that takes longer than usual keeps waiting rather than failing.
The Results row
Results is folded when you arrive. Each render appears newest first with a thumbnail, the model's name and a Continue in Image Studio link that opens it there. Switching to another drawing clears the picked camera, the results, the references and your Direction; the model, frame and look settings carry over.